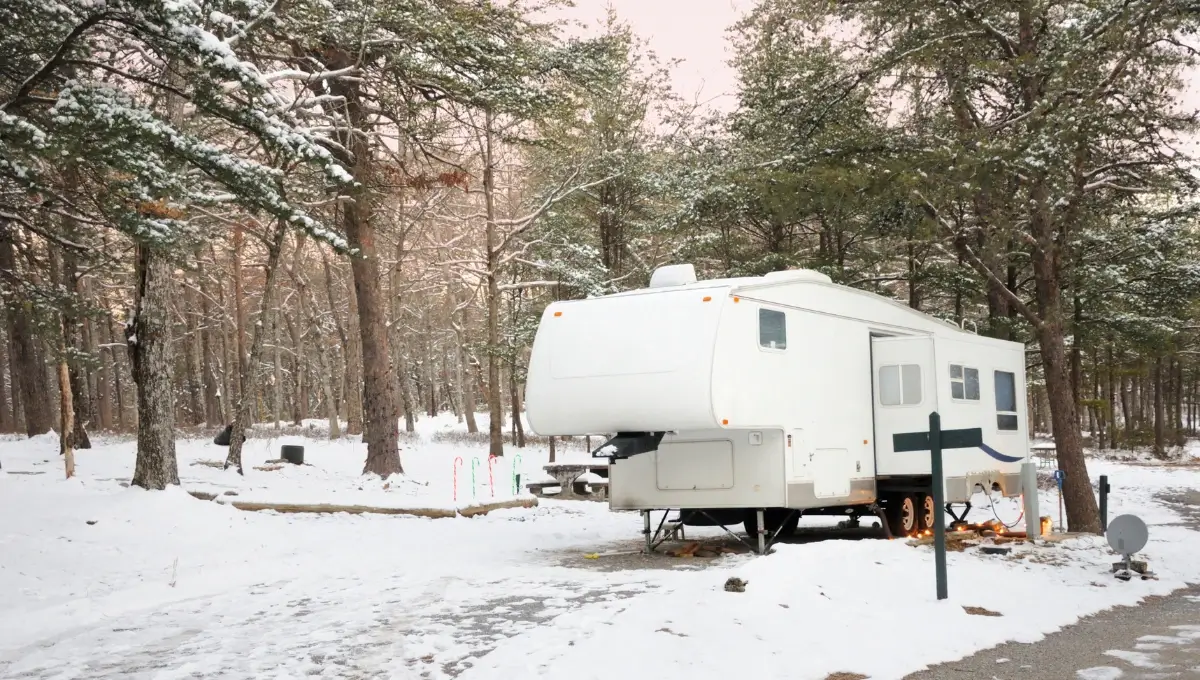
Winter is a time for RV owners to prepare for the cold weather by winterizing the RV’s plumbing and house parts. This process ensures the RV stays safe and prevents malfunctions. Certified RV technicians can assist with winterizing, and anyone can hire them to clean, fix, or winterize the RV.
- What is winterizing an RV?
- Why Do You Need to Winterize Your RV?
- When should you winterize your RV?
- What Happens if You Don't Winterize Your RV or Camper?
- Step-by-step checklist for winterizing your RV
- 1. Collect and assemble the required materials
- 2. Water filter removal
- 3. Draining and flushing the tank
- 4. Draining the water heater tank
- 5. All faucets to be opened and drain plugs removed
- 6. Replacement of drain plugs and closing of the faucets after drainage
- 7. The water heater should be bypassed
- 8. System connection to antifreeze
- 9. Any water faucet close to the water pump should be turned on
- 10. This process is repeated for all faucets
- 11. Flushing the toilet till the antifreeze flows out
- 12. A cup of antifreeze can be poured down the sink and toilet
- 13. Prepping RV for storage
- 14. User manuals should be consulted for ice maker/washing machine winterizing
- FAQs about Winterizing your RVs
- Conclusions
- Tell Us In The Comments Your Suggestions about How to Winterize your RV
 What is winterizing an RV?

Your rig’s water lines are not the only thing that might suffer from freezing temperatures. When you winterize your RV, you primarily prevent your water pipes from freezing by flushing them and then putting antifreeze in specific locations. You’ll discover that there’s much more to it than that.
Why Do You Need to Winterize Your RV?
When you winterize your RV, you are ensuring that it is ready for any upcoming freezing temperatures. It’s an essential component of RV ownership, especially if you intend to keep your RV for several months when it’s too cold to go camping.
Protecting the plumbing system of the RV is the most crucial step in the winterizing procedure. Water expands when it freezes, which is bad news for all types of plumbing systems, as we all know. Since RVs aren’t particularly well insulated, frigid weather poses a bigger problem.
When should you winterize your RV?
People who own RVs must start preparing to winterize them by the end of autumn. They must take the time, and precautions to prepare it every year to endure the cold weather conditions that might cause potential damage to the machinery, and fittings, especially if things get too cold.
When keeping your RV for the winter or going camping in really cold weather, you’ll need to winterize your RV.
A temperature between the low 40s and high 30s is a sign to start the winterizing procedure for RVs to keep them safer and long-lasting.
If you only camp sometimes or on the weekends, you’ll probably store your RV over the winter. If so, you should winterize the plumbing in your RV before putting it away to avoid damage.
Depending on how you’re traveling, where you are, and how cold it gets, you might still need to winterize your RV even if you’re a full-time or snowbird.
In general, you should generally winterize your RV even if it is in use if:
- The average temperature is 20 degrees Fahrenheit or less.
- You lack heated tanks or you are unable to insulate and heat the underside of your RV.
- You’re boondocking and can only run your furnace at certain times
Also Read: How To De-Winterize Your RV?
What Happens if You Don’t Winterize Your RV or Camper?
If an individual fails or forgets to winterize their RV plumbing system before extreme cold sets in, water in the pipelines could freeze, which can expand, and damage the pipe by cracking it.
The entirety of it can be very expensive to repair, not to mention the extra headaches, and time consumption.
Step-by-step checklist for winterizing your RV
Below are some important steps for Winterizing the RV.
1. Collect and assemble the required materials
The basic step is to assemble the materials for the winterizing process. For starters, 2-3 gallons of non-toxic RV antifreeze and some basic tools would be needed to remove the plugs that drain.
It also depends on what system the RV is already installed with as every RV may have some additional features and equipment.
A water pump converter kit can come in handy or one can also opt for basic tubes to pass the antifreeze through the system.
A water heater bypass kit may already be present in some RVs, but if in any case there is no such attachment, the owner must buy one and install it.
The tank cleaning wand and flushing system should also be present in the RV but if it is not, then they should be bought and installed in your RV.
Gather these necessary parts and tools to start the first step in winterizing your RV.
2. Water filter removal
The RV owner must make sure to remove any inline water filters (if installed) before pumping the antifreeze into the water system.
This step will make sure they are clean and ready for next spring usage. Expired filters must be changed regularly to avoid any further damage to the system.
3. Draining and flushing the tank
The black and grey tanks must be cleared and emptied at any dump station or campground sewer opening. The house should be left connected for enough duration so that everything can drain out properly.
The next step is flushing out both the tanks and if no flushing facilities are pre-installed, the owner should use a cleaning wand along with an external system to flush out any accumulation and clean the tanks.
4. Draining the water heater tank
Remove the drain plug for the water heater after switching it off. The water can cool down in no time if the switch is turned off before draining it.
The plug can be replaced after it has been fully drained. Check the switch system again to be sure.
5. All faucets to be opened and drain plugs removed
This step is vital it allows the water in the tank to fully drain out. Both hot and cold lines should be left open to drain for a minimum of 15 minutes.
This ensures that all excess water has been drained out perfectly. The water can be drained quickly if the water pump is turned on during the process.
However, it is necessary to make sure to turn the pump off if the pressure becomes low. It safeguards the pump from any damage that can be caused by running it with no water.
6. Replacement of drain plugs and closing of the faucets after drainage
Every faucet should be closed and drain plugs replaced after the water has been fully drained. Only after this, the owner can pump the antifreeze through the system for winterizing the RV.
7. The water heater should be bypassed
The water heater bypass kit is installed in most RVs nowadays, but if it isn’t, then one can purchase and install it on their own.
This step is to ensure that the antifreeze does not enter the water heater because it is not at all necessary.
The heater should not be harmed in any way, even if the antifreeze enters it, but 6-9 gallons of antifreeze can be wasted if that happens as it depends on the tank size.
Taking help from a local professional is a wise decision if one is not sure about the installation process.
8. System connection to antifreeze
The water pump converter kit is installed as it enables the RV to pump antifreeze into its system.
The other way to do it without installing a convertor kit is to directly drop a water intake line into the antifreeze.
This method may need more tubing and proper handling to avoid spillage and wastage.
9. Any water faucet close to the water pump should be turned on
The water faucet should be turned on and kept at a slow pace until the owner notices the antifreeze pink solution. The hot faucet should also be turned on for the pink solution to fall out.
10. This process is repeated for all faucets
Use the method for every sink by keeping the faucets open until antifreeze flows out. Keep replacing the antifreeze jugs when needed and keep track if one has an outdoor shower facility.
11. Flushing the toilet till the antifreeze flows out
The winterization of the toilet and septic system is also very crucial so let the antifreeze flow out from the toilet. This can help keep it clean and winterized for long winters without any damage to inner pipelines.
12. A cup of antifreeze can be poured down the sink and toilet
This step is mandatory (a better option) to ensure that the antifreeze is running through every pipe and line of the RV. It will also help in flushing antifreeze into the black water holding tank and the gray tank.
13. Prepping RV for storage
Close every faucet and keep the water heater heating element off. The RV is winterized and ready for traveling.
14. User manuals should be consulted for ice maker/washing machine winterizing
RVs have different kinds of ice makers and washing machines with different sets of instructions. Similarly, the winterization of these appliances can be different and can vary from one RV to another.
It is a better option to consult and thoroughly go through the user manual before winterizing the appliances.
FAQs about Winterizing your RVs
A lot of questions come to our mind while winterizing you RV, some of the commonly asked questions are answered below.
Q. How much antifreeze Do I need to winterize my RV?
A. To avoid antifreeze in your RV, use 2-3 gallons of antifreeze and install a pump bypass kit if the water pump draws from the RV’s fresh water tank.
Q. Do you put RV antifreeze in the freshwater tank?
A. Avoid adding antifreeze to your fresh water tank to pump it into your water supply, as this is ineffective and reduces its protection level.
Q. Can I use the toilet in a winterized RV?
A. Winterized RVs can still use toilet facilities with 1-gallon jugs filled with water and RV antifreeze in holding tanks to prevent freezing.
Q. How long does it take to winterize an RV?
A. Winterizing your RV can be completed in 20-30 minutes with proper tools and familiarity with your water system, saving time and effort.
Conclusions
After completing these steps and checking all systems thoroughly, the RV is good to go. Inspection of every part is a necessary step before the season changes, to avoid any problematic situations during winters or harsh weather conditions. One can tackle the winterizing process themselves or hire someone to help. These steps will help the RV owner to keep it safe and winterized for years to come, though it is advised to winterize it every year.
Tell Us In The Comments Your Suggestions about How to Winterize your RV
Also, don’t forget to book your personalized holiday package with Fiery Trippers. Let us make your vacation a romantic as well as a dreamy getaway.
Unleash the Savings: 🤑 Expert Tips for Cutting Costs on RV Insurance
🤔 How To Choose The Right RV Insurance Company? Your Ultimate Guide


